
This dialog box brings all the typography options at one place. You can change the text styles of individual elements very easily.
1 Selection Radio Button
![]()
Allows you to choose the element with which you want to define the typography. Here is what happens if choose the following-
Complete – You can customize the typography for any element from the list given in the extreme left of the window.
Headings- It will let you specify the typography of headings only while making the list of elements inactive.
Text- It will allow you to define the styling of text only.
2 List of Elements

From the given list, you can choose the element whose text style you want to change.
3 Google Web Fonts

From this list, you can select any Google font for your website. And if you want to browse more fonts online, Click on the “Google Fonts” button.
4 Custom Fonts

This is the list of custom fonts, you can select any font from the given list. Click on the ” Browse” button to browse and find more custom fonts.
5 System Fonts
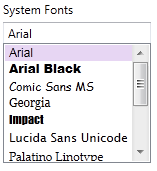
If you want to use a system font for your website, you can select the preferred font from the shown list.
6 List of Font Styles

You can choose the preferred style for the chosen font from this list of font styles.
7 Font Size Options

From this list, you can choose suitable font size as needed.
8 Change Font Color
![]()
You can choose a suitable color for the text with this tool.
9 Alignment

Use this option to modify the alignment of the text. According to the need of your template/theme or website, you can set the alignment of the text.
10 Margin

Specifies the margin of the text. You can mention the Top and Bottom Margins.
11 Select Font Effect

Use this option to choose an underline or strike through style for the text.
12 Text Preview

This option lets you preview the text style.
13 Save
![]()
Applies the text styles and saves it.
14 Cancel
![]()
Cancels the changes you have done and closes the dialog box.