Follow these steps to upload your theme in Blogger:
STEP 1: While exporting the theme in TemplateToaster, you have to add a Google account. And in case you do not have a Google account then add a “New Account” and click the “Ok” option.
STEP 2: Then log in to your administrator dashboard.
STEP 3: Navigate from the left sidebar menu, and open the Template –> Backup/Restore to add the theme. After clicking Backup/Restore you will get a dialog box as shown below.
STEP 4: Now browse and add the .xml file of your template.
STEP 5: Now your theme is successfully uploaded. Also you can view the blog to see your uploaded template.
Even after the installation, customizing the TemplateToaster theme is quick and easy. You will see an additional Theme settings Tab in the Settings page. These theme settings give you the flexibility to change some elements of your theme. Let us have a look at these theme options:
1 Menu Style Options
This tab provides you the options for styling the custom menu. If you select the ‘Horizontal’ option then it will give the “main menu” look . But if you opt ‘Vertical’ option then your menu will have the “sidebar menu” style.
2 Style Options
This tab is used for styling blocks in the ‘Menu’ positions. If you opt for TTDefault then it will give a “Sidebar Widget” look to the block. And if you select ‘No Style’, then no styling will be there.
Follow these steps to upload your theme in Drupal:
STEP 1: Log in to your administrator Dashboard in Drupal.
STEP 2: From the to menu of dashboard, navigate to Appearance and Click on Install new theme option.
STEP 3: As you click Install new theme, you will see a browse window as shown below. Browse your theme and click the “Install Now” button.
STEP 4: After the successful installation of your theme , a confirmation message will display as follows. Now Enable the theme by selecting your theme from Enable newly added themes.
STEP 5: After enabling the theme, it’s all done and you may visit the site to see how it looks on browser.
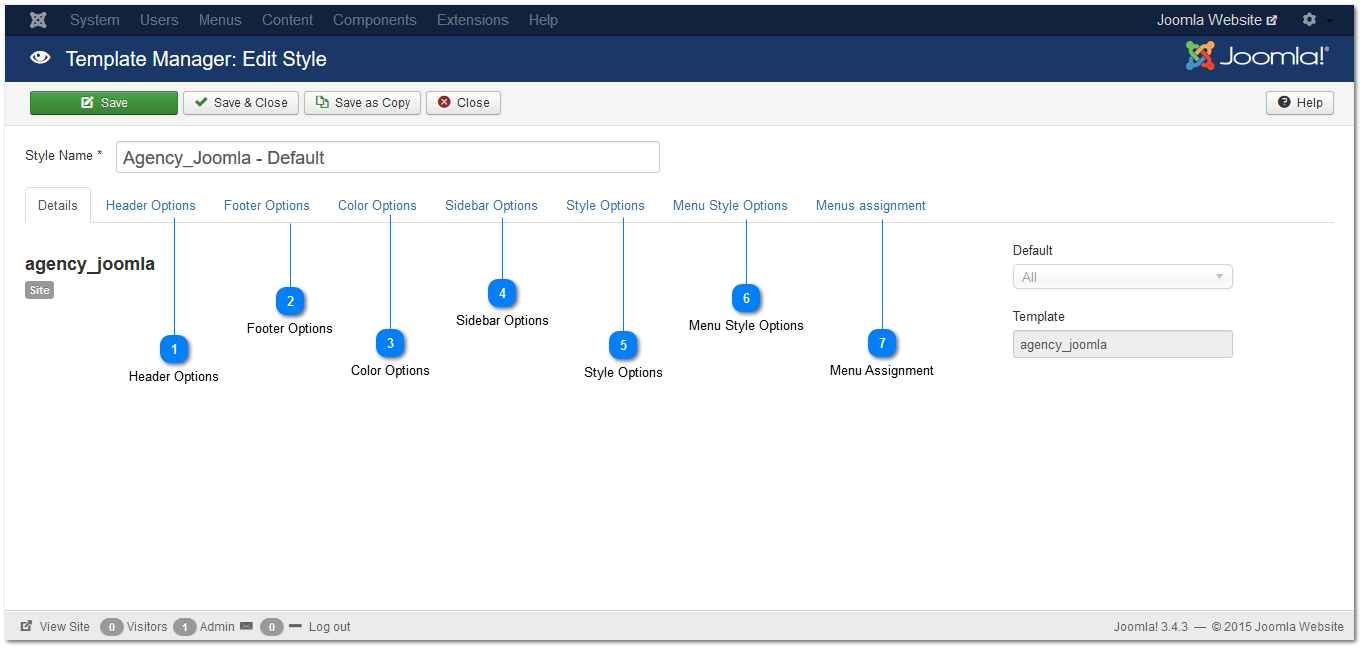
Firstly, even after the installation, customizing TemplateToaster’s theme is very easy. Also you will see an additional tool when you open the specific template settings, under the name ” Theme Options”. Again these theme options give you the flexibility to change some elements of your theme. Now let us have a look at these theme options.
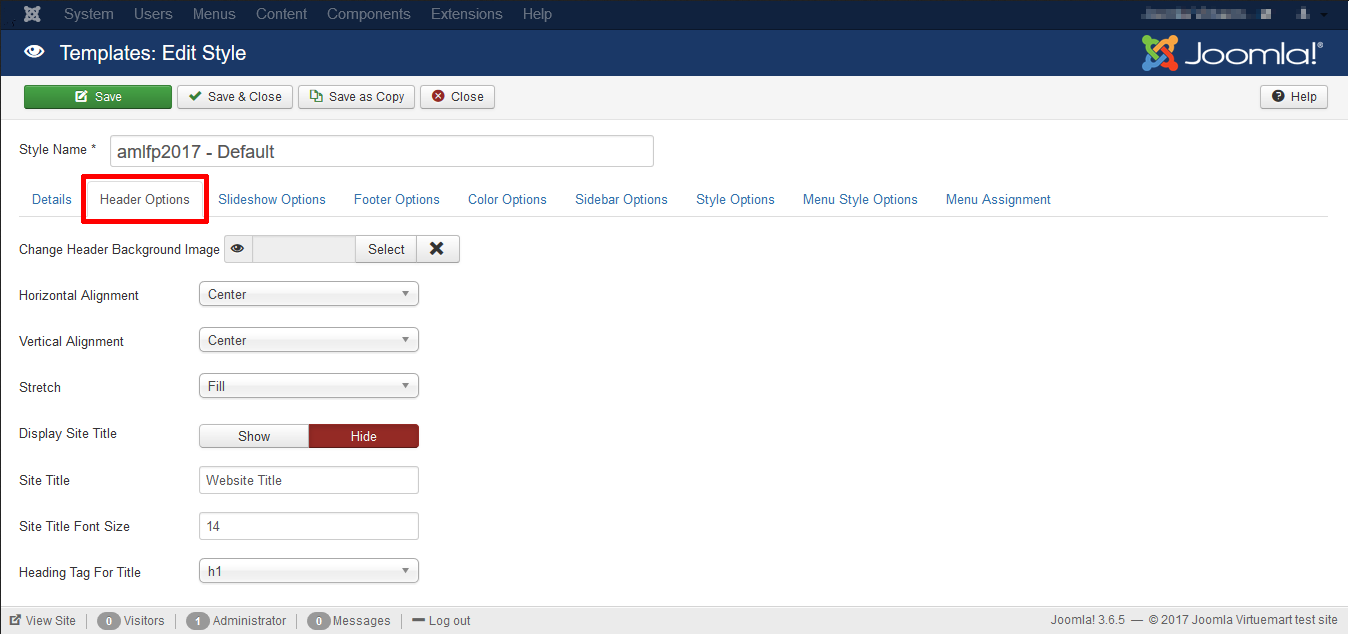
1 Header Options
First of all this tab provides you the option for customizing the header settings. Additionally, you can customize the header settings as required for the website.
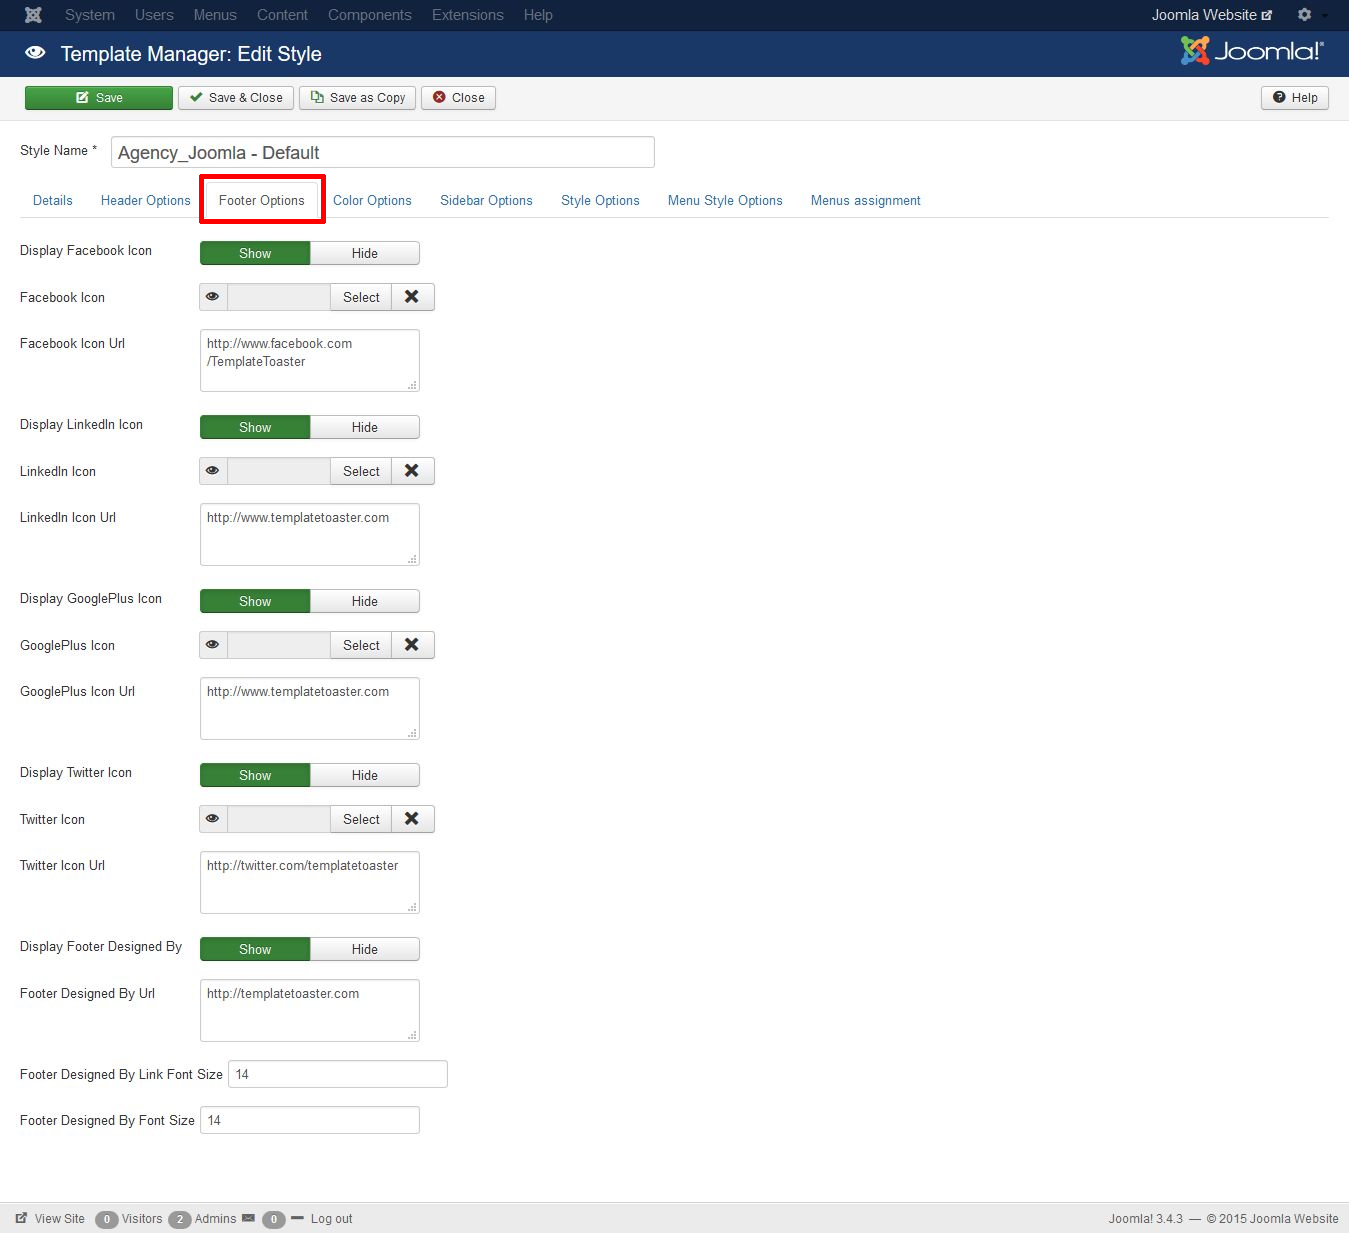
2 Footer Options
Significantly this tab contains the options for customizing the footer settings. Moreover, you can find various footer options for various social media platforms and many other customizing options for your website.
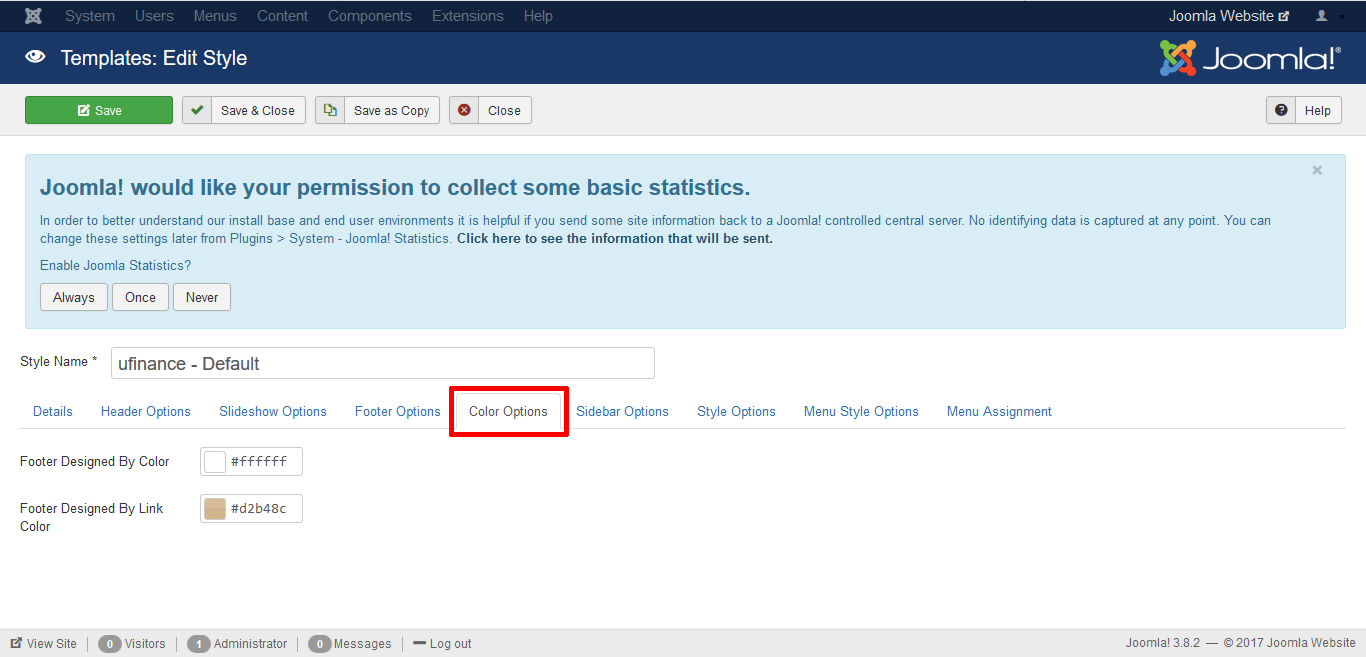
3 Color Options
Again this tab includes the options for customizing the color settings. Also you can customize the color settings for the footer here.
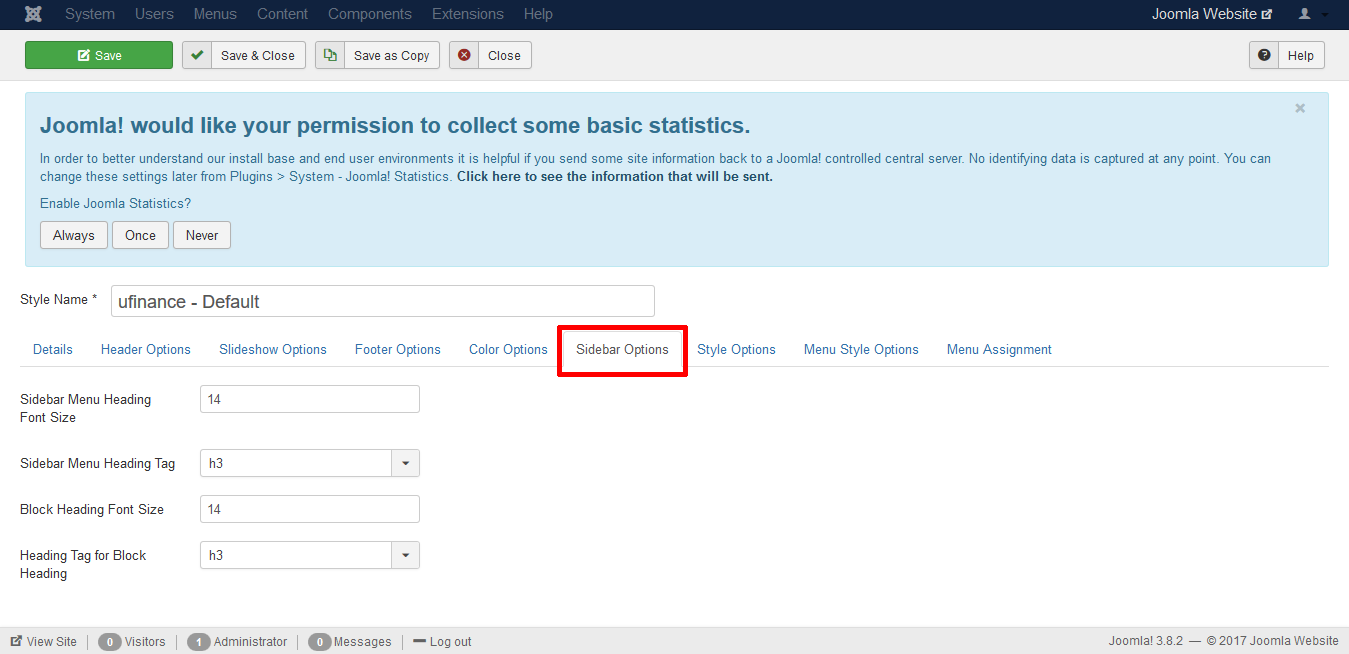
4 Sidebar Options
In addition this tab provides you the option for customizing the sidebar settings. Further you can manage the sidebar options for your website.
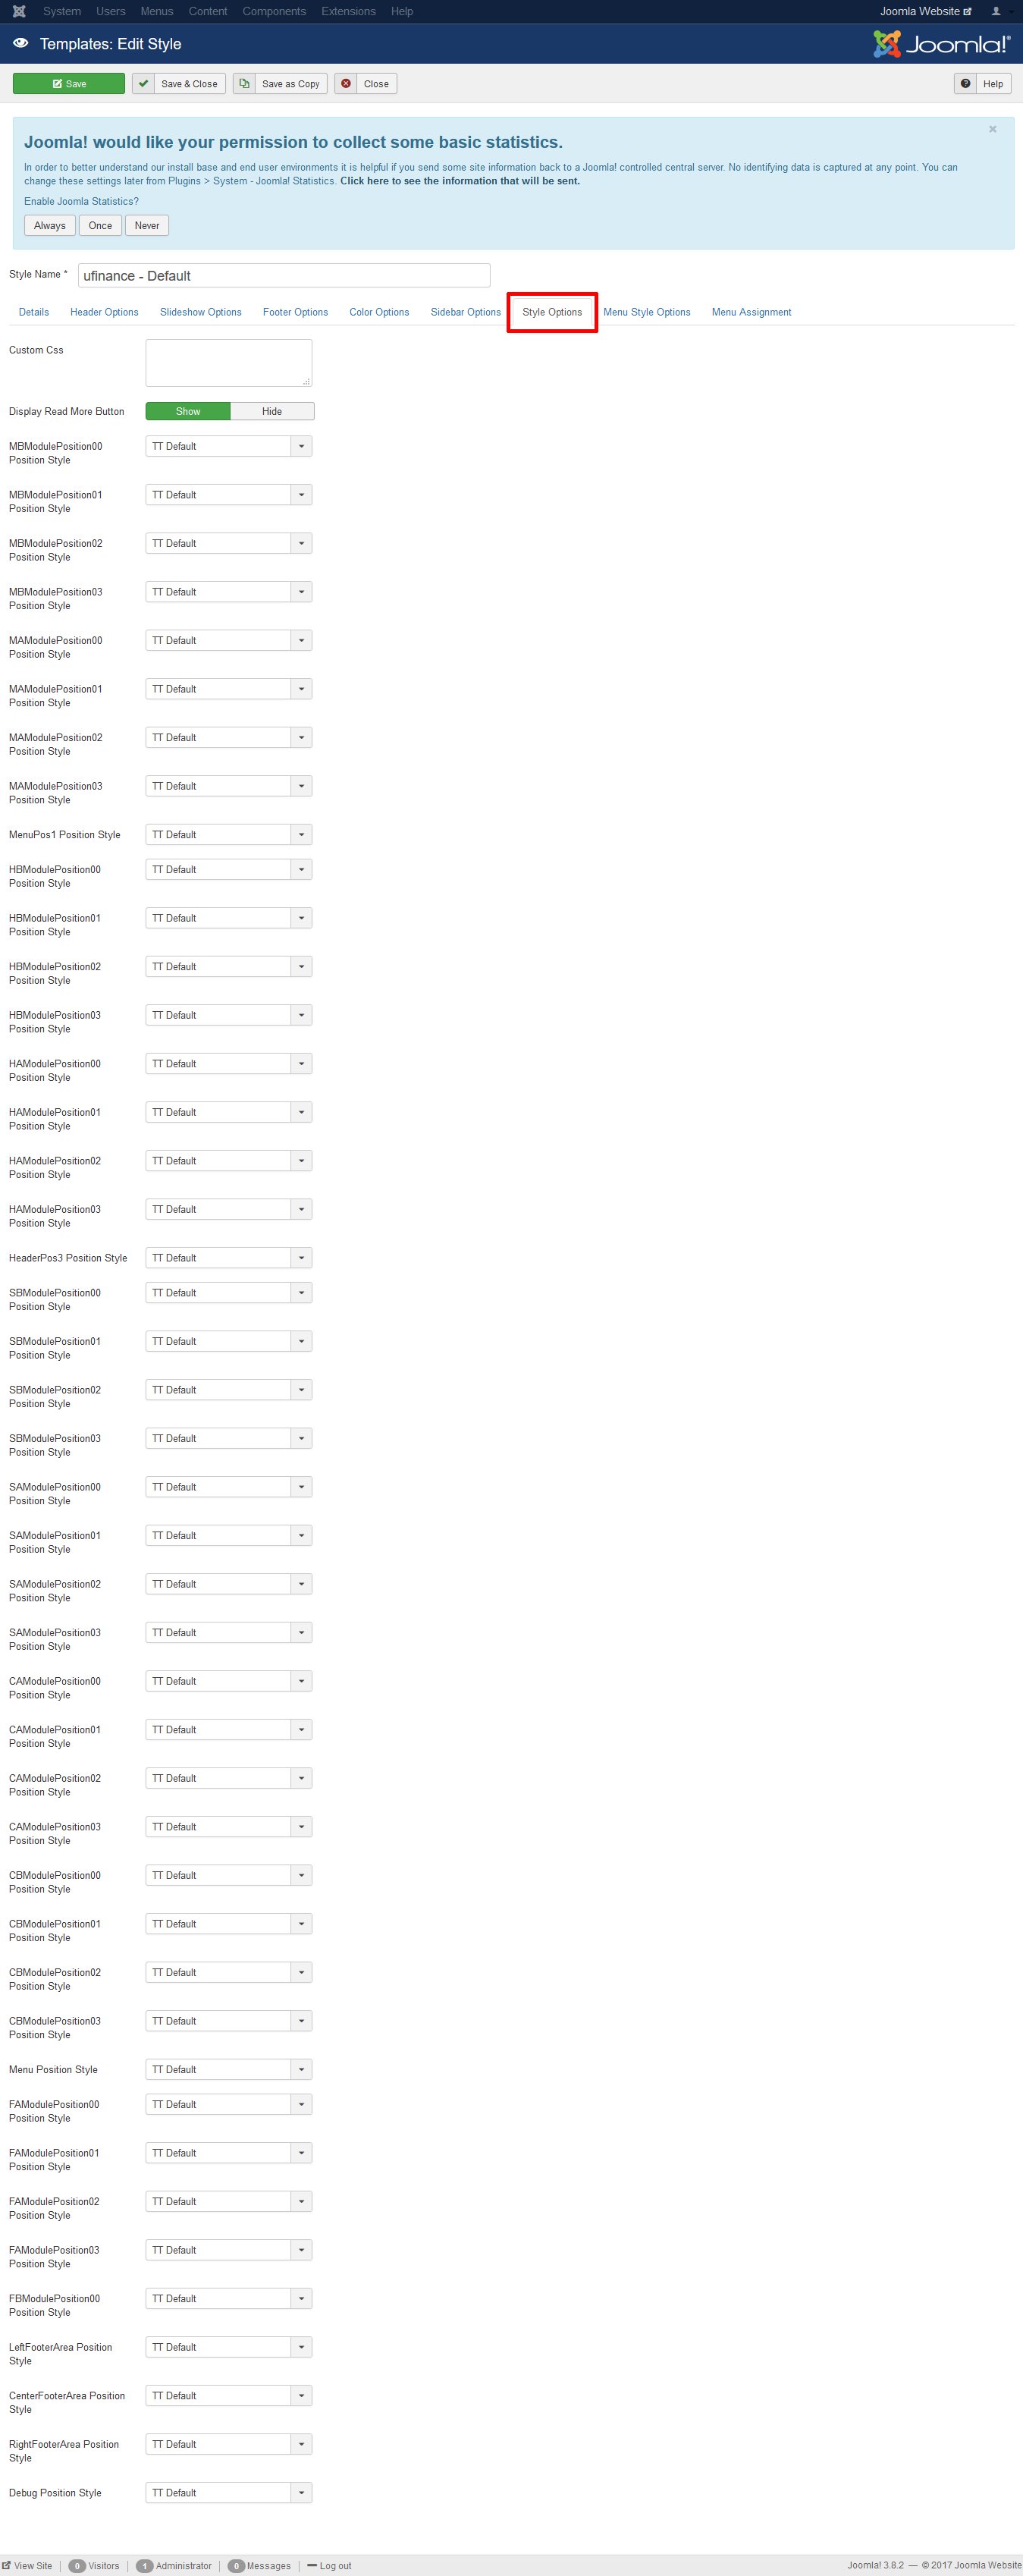
5 Style Options
Moreover, this tab provides you with the options for customizing the style settings. As well, TT default settings are enabled however, you can also choose other setting options.
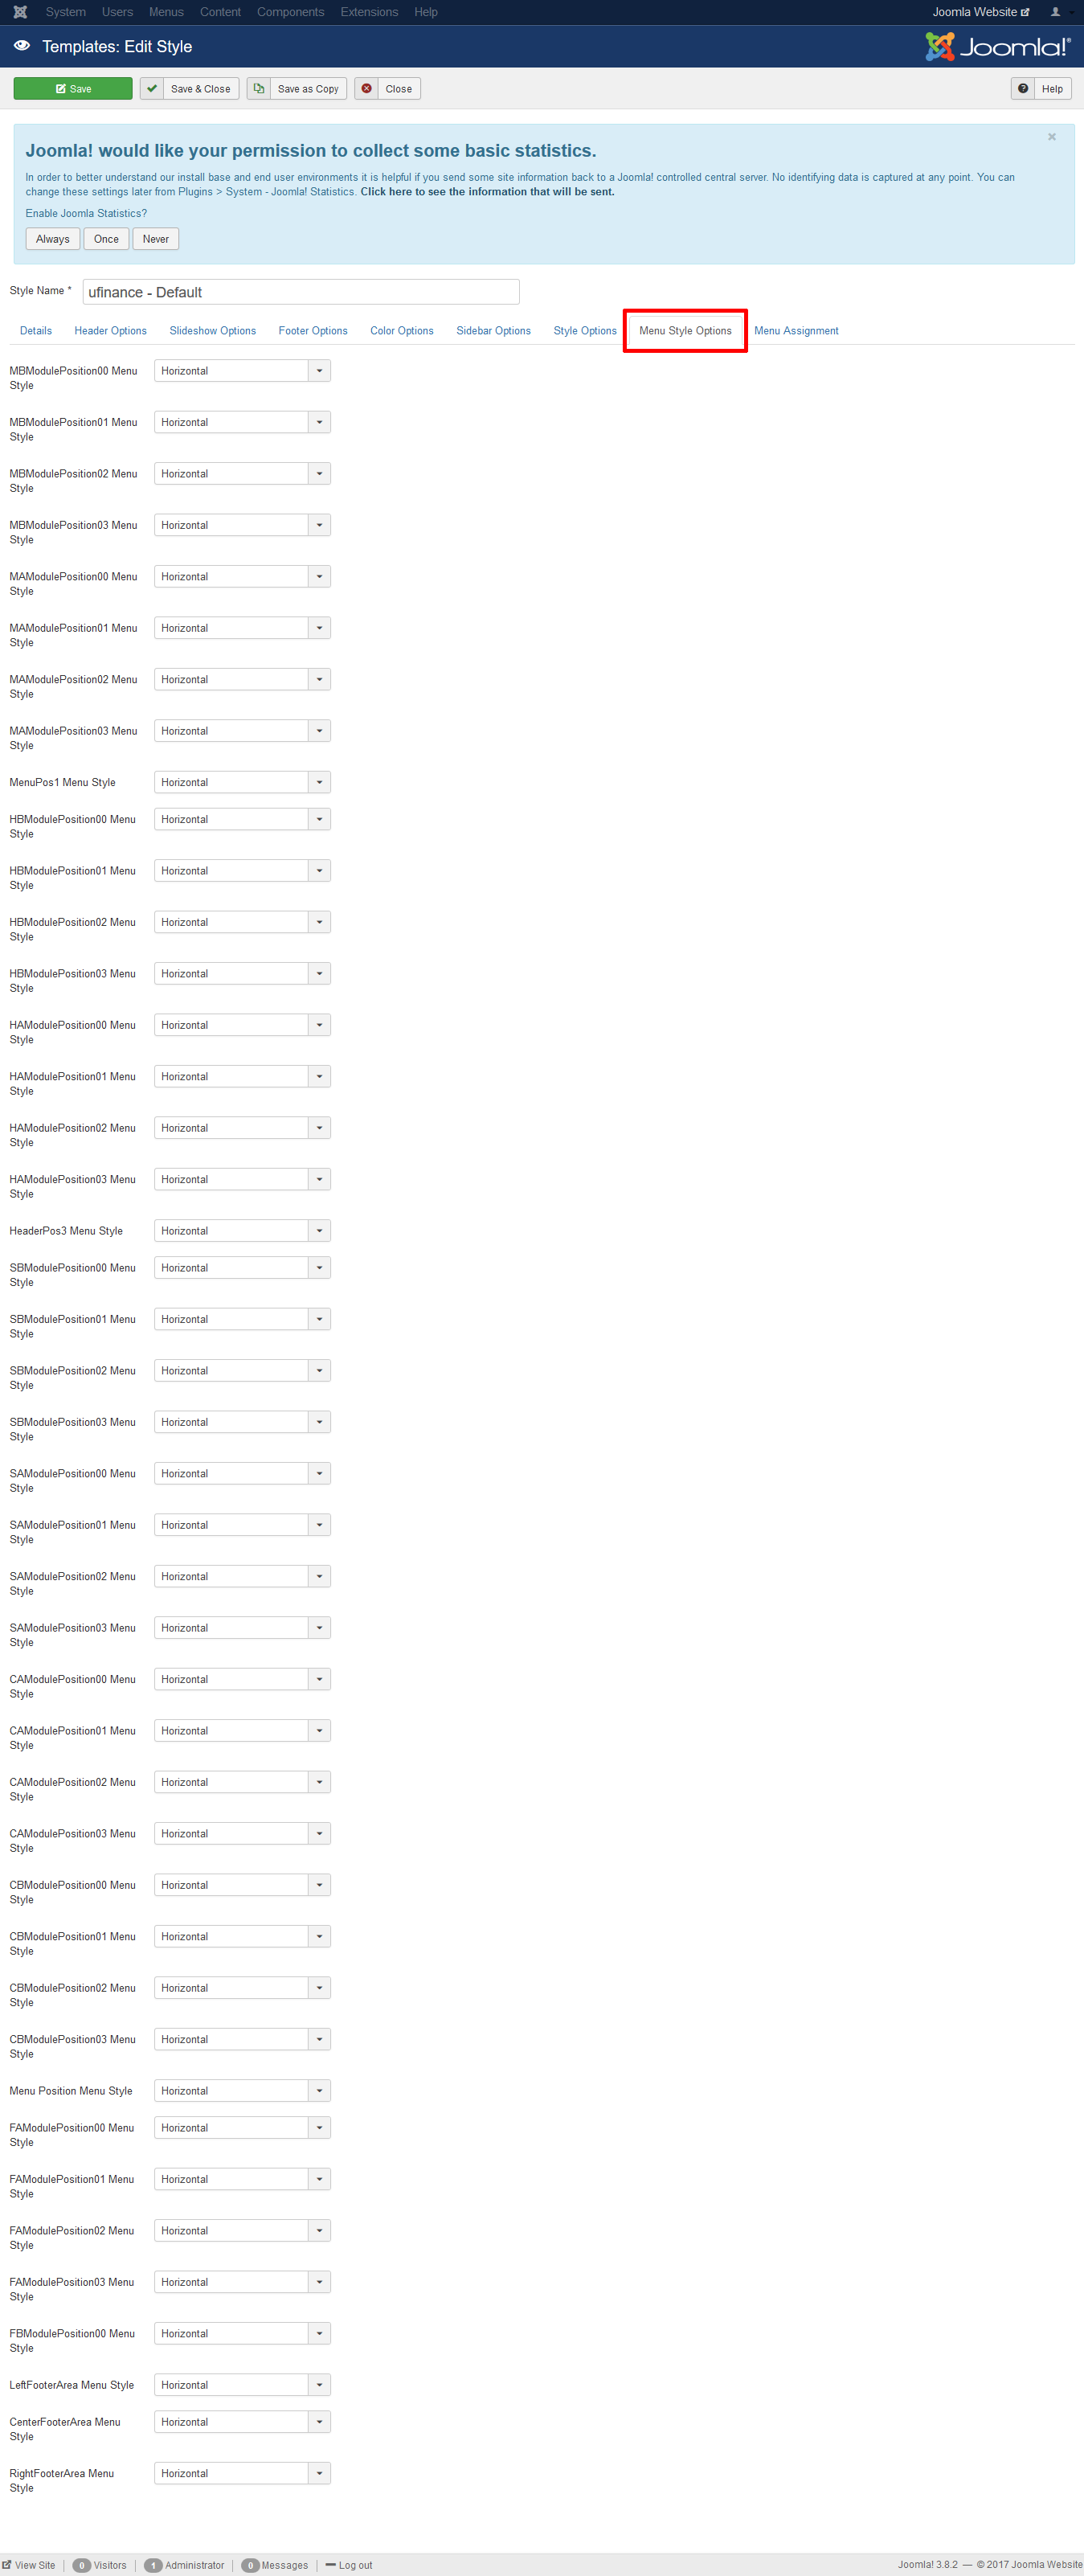
6 Menu Style Options
Also this tab provides you the options for customizing the menu style settings.
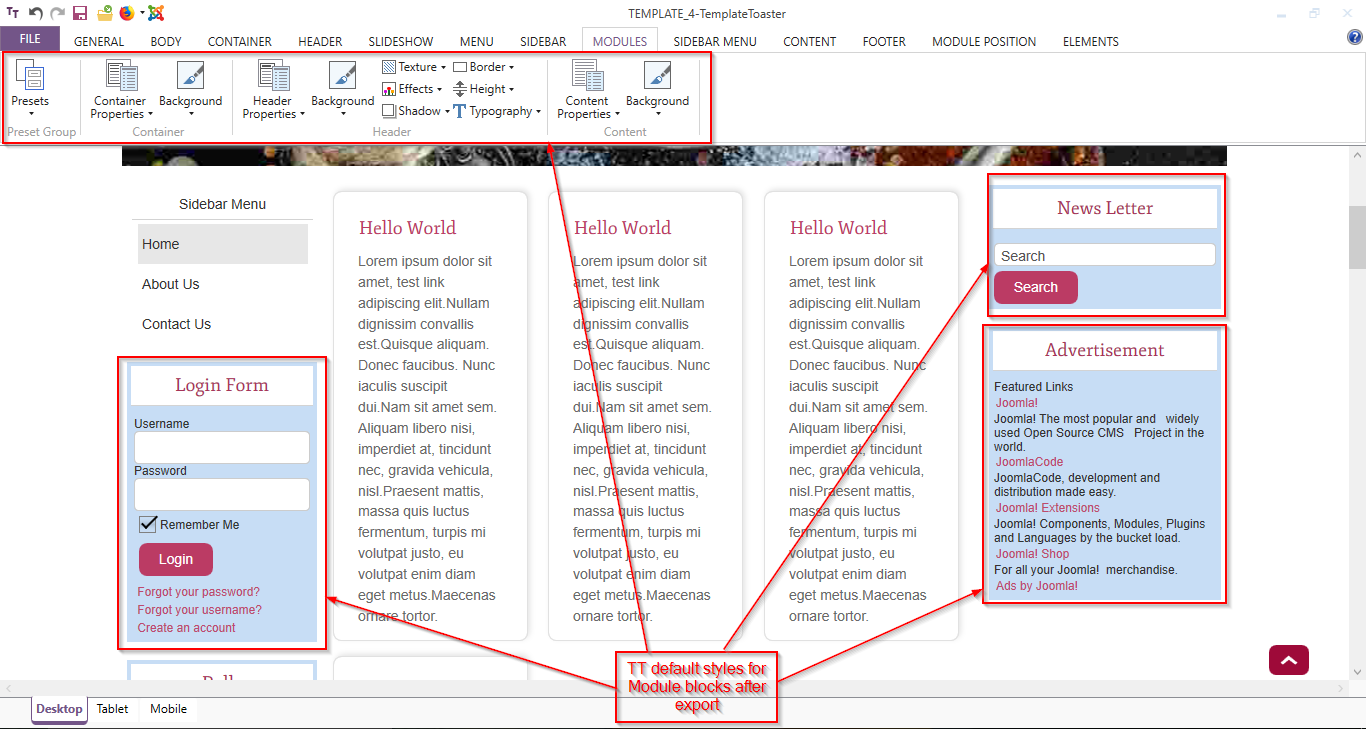
Moreover, you can select TemplateToaster module block style i.e. TT-default. Styles selected for Sidebar module in TemplateToaster will be applied on the blocks in module position.
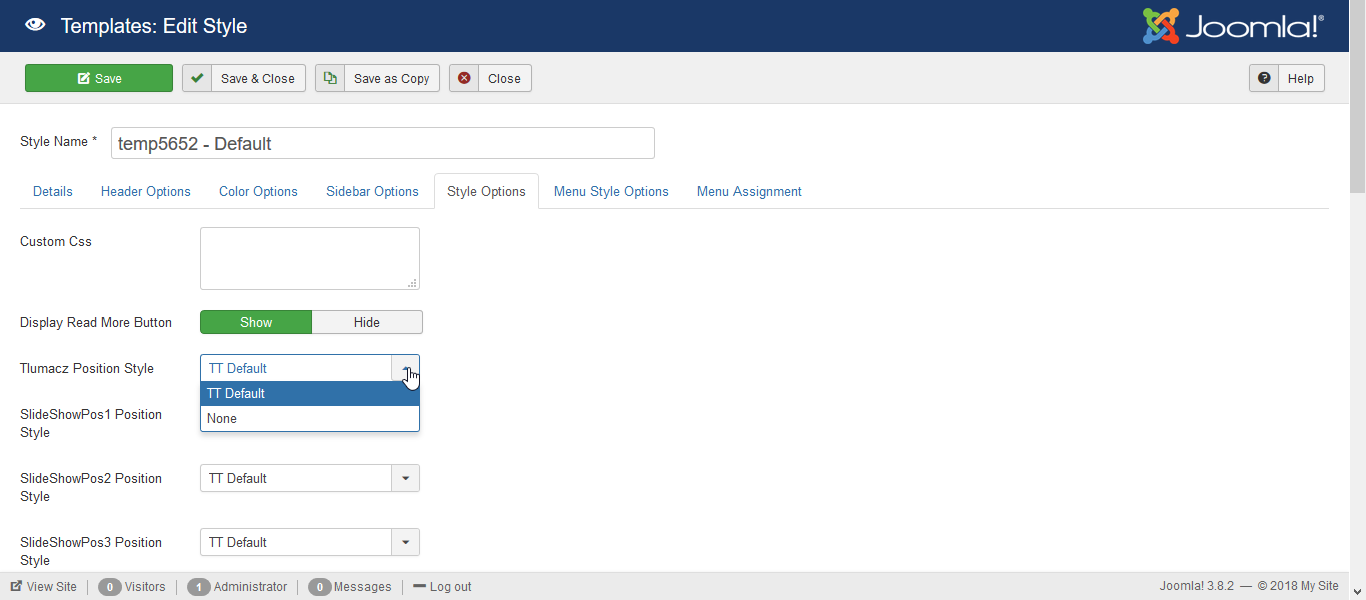
Firstly, Go to Joomla backend -> Extensions -> Templates -> Edit Template -> Style Options -> select style as ‘TT default’.
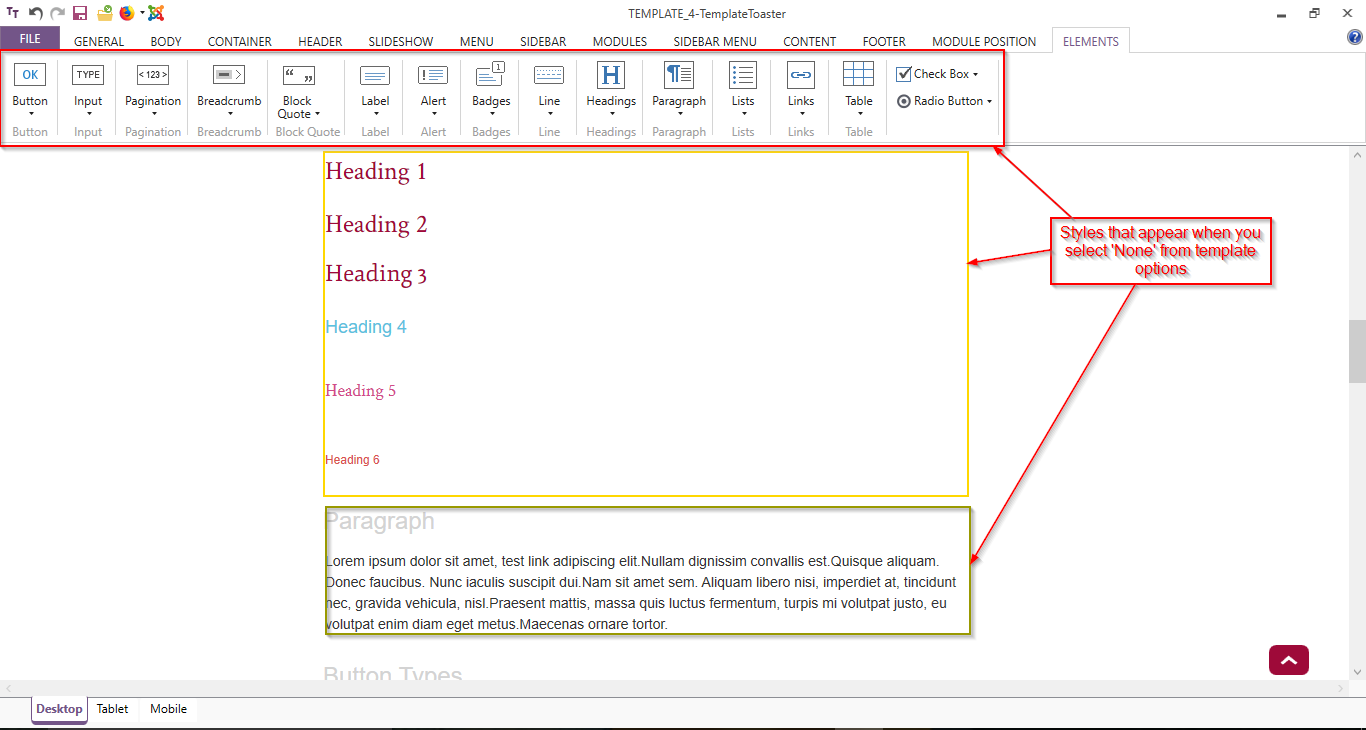
Or you can select default TemplateToaster styles i.e. ‘None’, for the blocks in module position. And it will apply the styles selected for the elements in Element tab in TemplateToaster:
Next Go to Joomla backend -> Extensions -> Templates -> Edit Template -> Style Options -> select style as ‘None’.
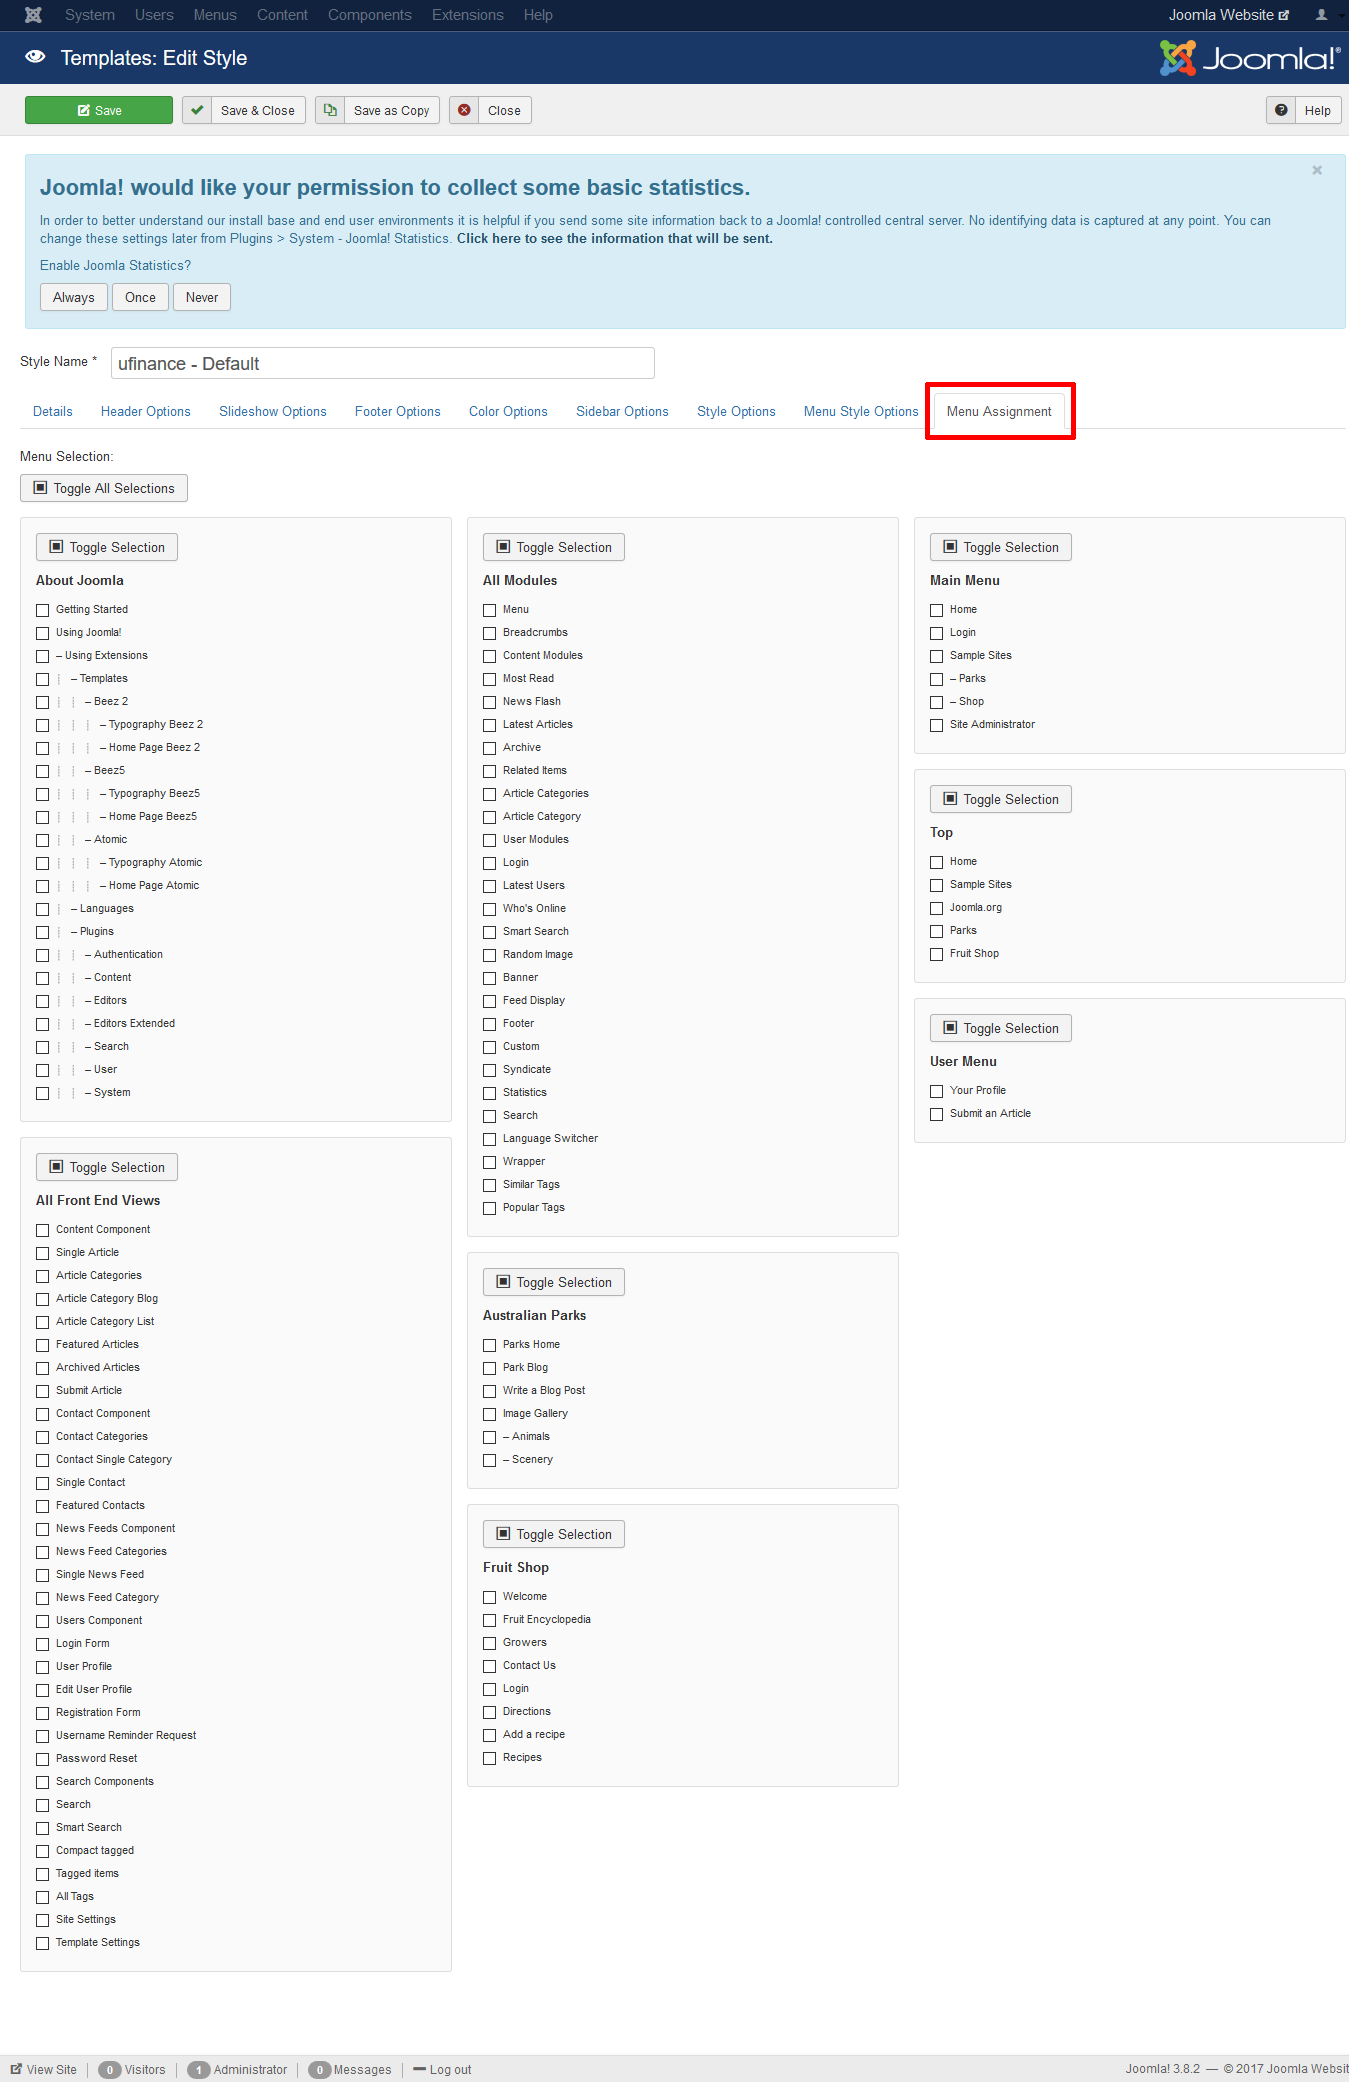
7 Menu Assignment
Again this tab contains the options for customizing the menu assignment settings. Furthermore, you can choose the best suitable option as needed.
Do you want to upload a template/theme in Joomla? Well, it is very easy and quick with TemplateToaster. You can follow these steps to upload your theme/template in Joomla:
STEP 1: Log in to your Control Panel.
STEP 2: From the top navigation bar of panel, navigate to Extensions -> Extension Manager.
STEP 3: Click the browse button and install the theme by clicking on the upload and install button.
STEP 4: After uploading the theme, set the theme as your default theme.
STEP 5: Now you can visit the site and can see how it looks on the browser.
Double-click the content and a menu bar, as shown below. It allows you to edit the content of rows and columns. Let us discuss the functions of these options for editing and formatting the content.
1 File Menu
The File Menu consists of general formatting options such as Undo, Redo, Bold & Italic styles, Alignment styles, Bulleted list, Numbered list, Left/ Right Indentation, and Inset/Edit link. You can choose accordingly.
2 Edit Menu
Edit menu contains general editing options such as Cut, Copy, Paste, Undo, and Redo. You can select as required.
3 Insert Menu
The Insert menu includes the options to insert links, special characters. Media, Read More tag, and Page Break.
4 Format Menu
Format Menu consists of the most commonly used text formatting options such as Bold, Italic, Underline, Strikethrough, Superscript, and Subscript.